Introduction
In this tutorial, we will set up a new switch. When we are finished, we will be able to:
- Register a SIP phone with our switch
- Make a call from our SIP phone, to a phone number
- View the CDRs from the perspective of the end user, and vendor CDRs from the perspective of the Switch administrator
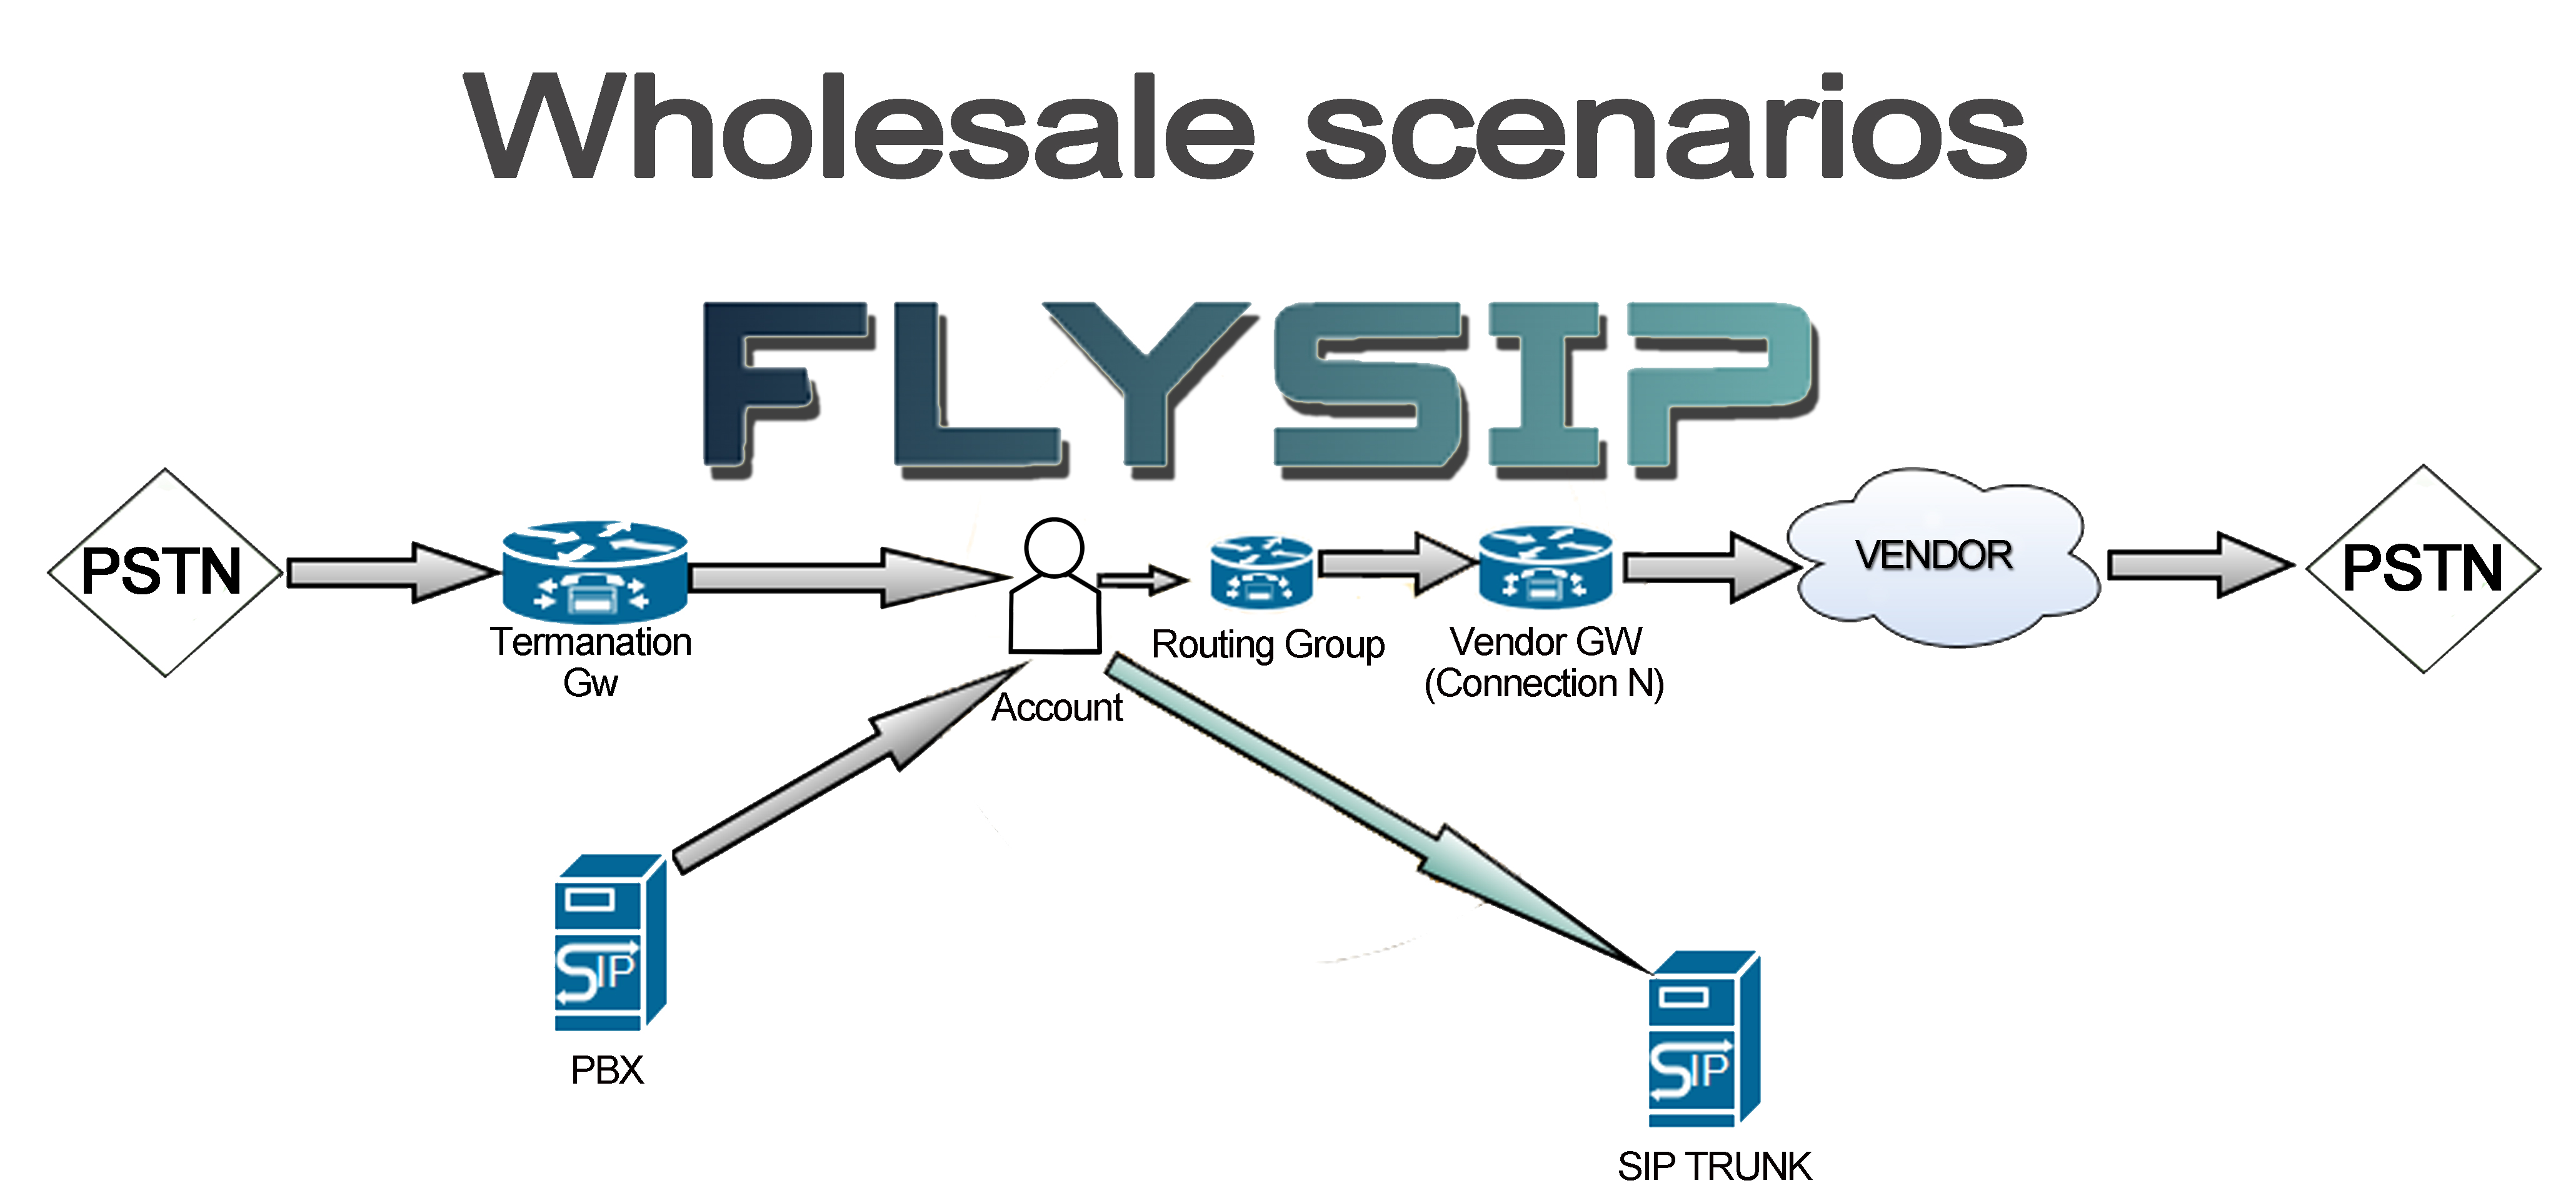
In this tutorial, we will configure our switch for the imaginary company 'Call Integrale', We also will use an imaginary vendor called 'Lancia Tele'. These imaginary company are useful when explaining the various concepts and roles of the different parties involved in a call.
Prerequisites
To successfully complete this tutorial, we assume you have the following:
- A SIP termination provider that you can terminate voice calls to
- A SIP phone
Step 1. Setting up Vendors
The first step will be to create a new Vendor, and Vendor Connection. In our example, we are using the fake company LanciaTele.com for termination. They have provided us with a SIP gateway called sipgw.lanciatele.com
Creating our first Vendor
- Navigate to the Vendors screen by clicking on 'Vendors' in the left hand navigation menu.
- Click the 'Add' button.
- On the 'Add New Vendor' screen,
- Enter the name of your Vendor into the Vendor Name field.
- The Web Login and Web Password fields will automatically be filled in. This optionally allows your vendors to log into your system to see CDRs related to their connections
- Set the Base Currency, this should be the currency in which you do business with your Vendor. We will use USD in this tutorial.
- Set the Time Zone to the same Time Zone that your vendor bills you in. This will make future reporting and reconciliation with your vendor easier.
- The Balance field is used to track your balance with your Vendor. For example, you can leave this at zero, and as you terminate calls, the balance will go negative.
- Click Save & Close

Creating Vendor Connections
The next step is to create a Connection under your newly created Vendor record. It is common for a vendor to have multiple connections, but in this guide we will only create one.
- On the Vendors screen, click the 'Connections' action link for the newly created Vendor.
- On the Connections screen, click the Add button
- On the Add New Connections screen
- Give your connection a meaningful name using the Connection Name field.
- Select the protocol of your connection using the Protocol pick-list. We will be using SIP in this guide.
- Set the hostname or IP address of your Vendors gateway connection.
- If your vendor requires digest authentication, then fill in the credentials from your vendor using the Username and Password fields. If you do not use digest authentication, then leave these fields blank.
- Optionally, if you need to add or remove prefixes for your traffic for this connection you can do so in the Number Translation section on this screen.
- Click the Save & Close button.

3. Add Termination Routes

4. Add Routes and Price for vendors

5. Add Routing Group
6. Add Tariff for accounts
7. Add Rates and Price for accounts

8. Add Account
9. Add Auth. Rule for IP to IP

10. Make Test DialPlan to check the configuration
