FlySIP offers a call recording feature that allows you to record and save your conversations for future reference. To set up call recording, you need to follow a few simple steps:
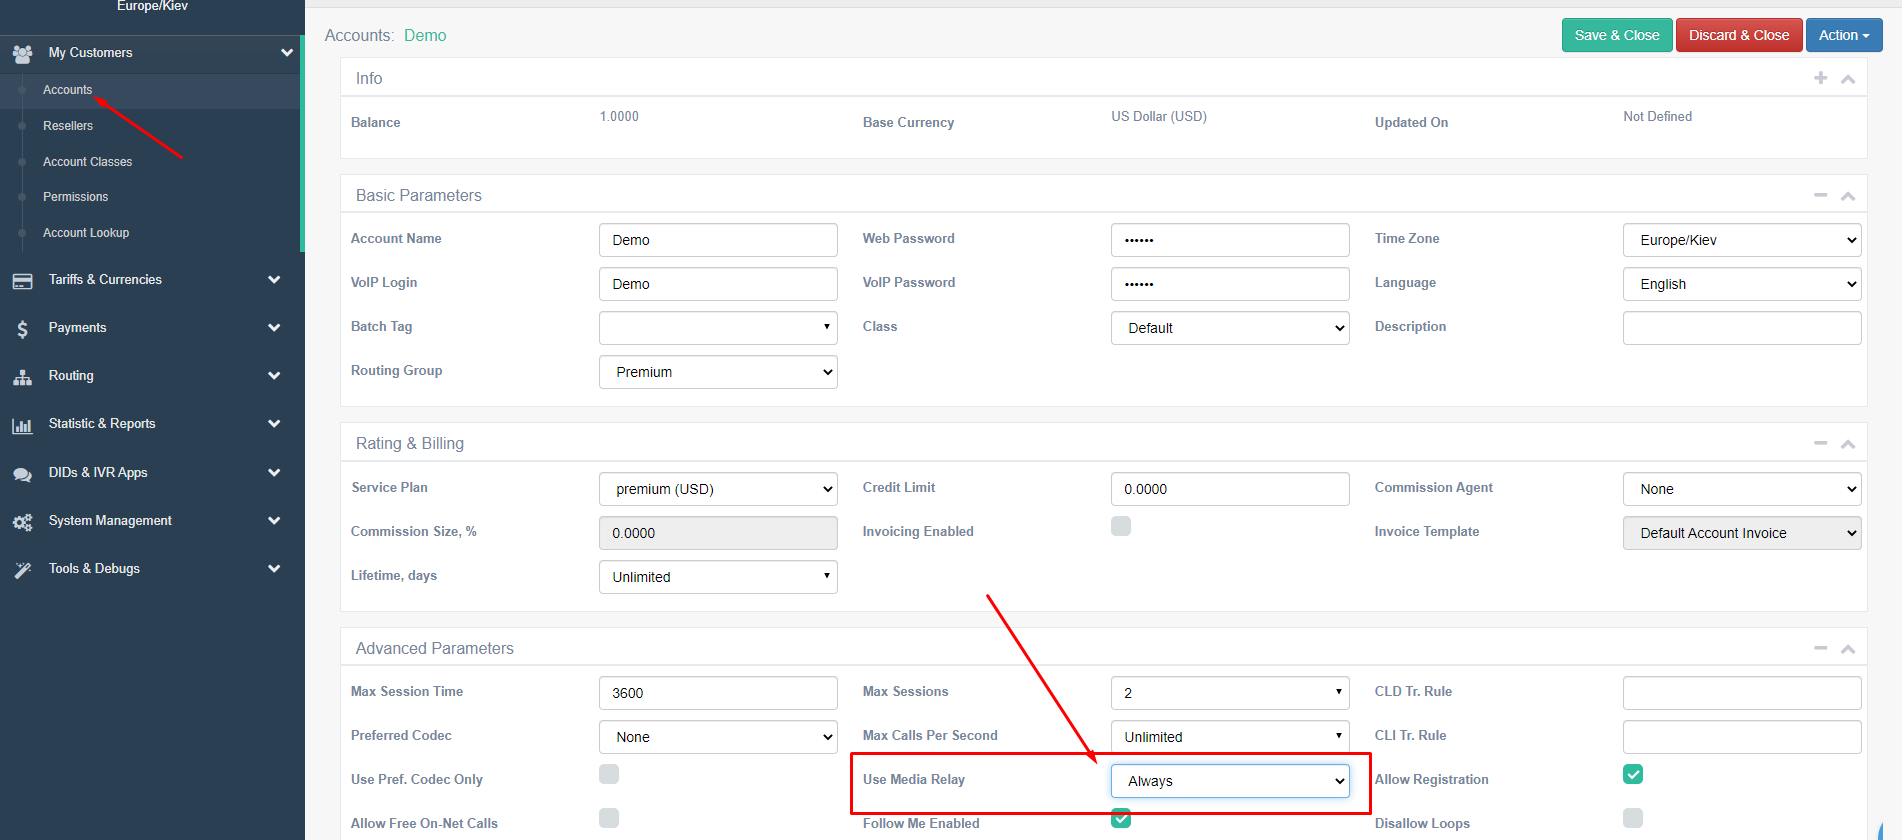
Step 1: Install "Use Media Relay - Always" for account.
To enable call recording, you need to install "Use Media Relay - Always" in the desired account. This can be done by logging in to your FlySIP account and navigating to the settings page. From there, you can select the desired account and enable the "Use Media Relay - Always" option.
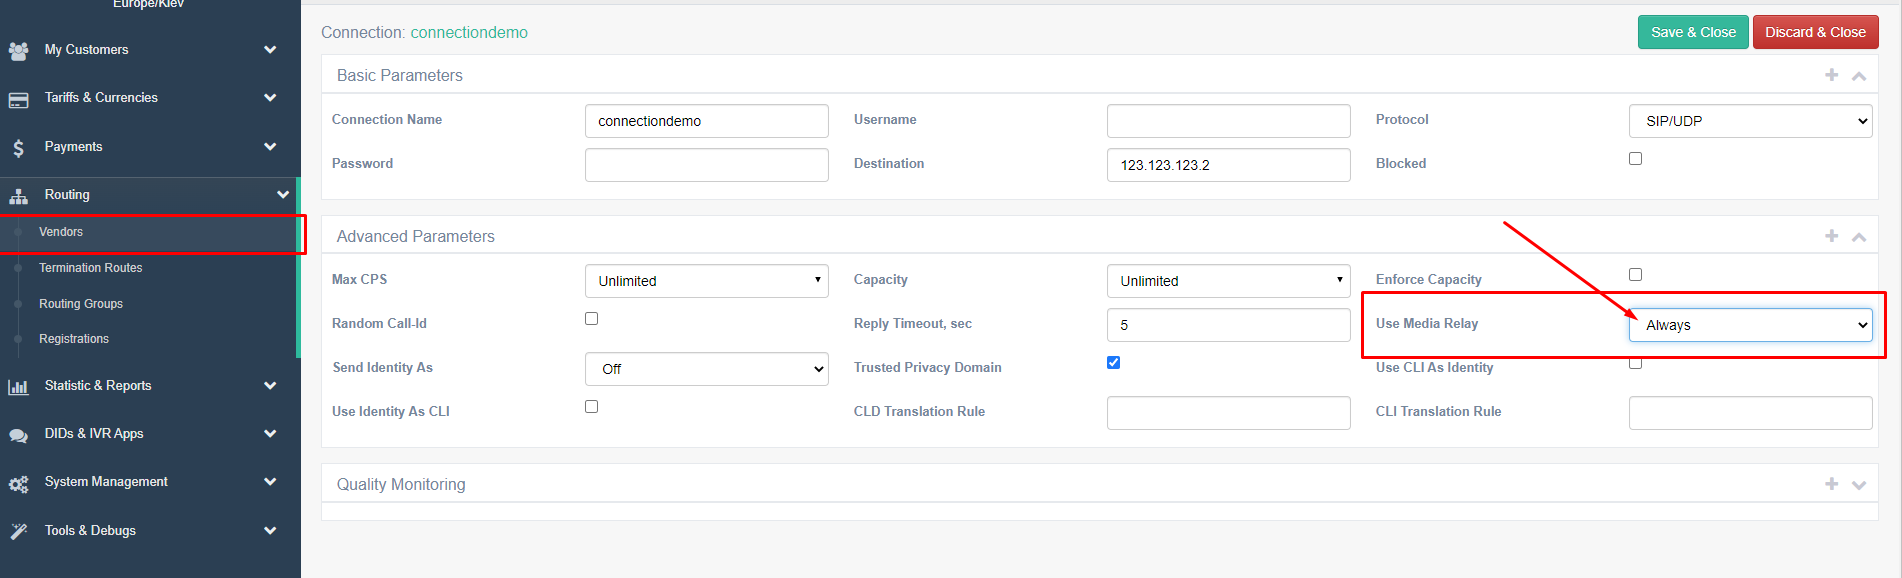
Step 2: Activate Media Relay for a specific connection.
To do this, you need to set "Use media relays - Always" in the desired connection
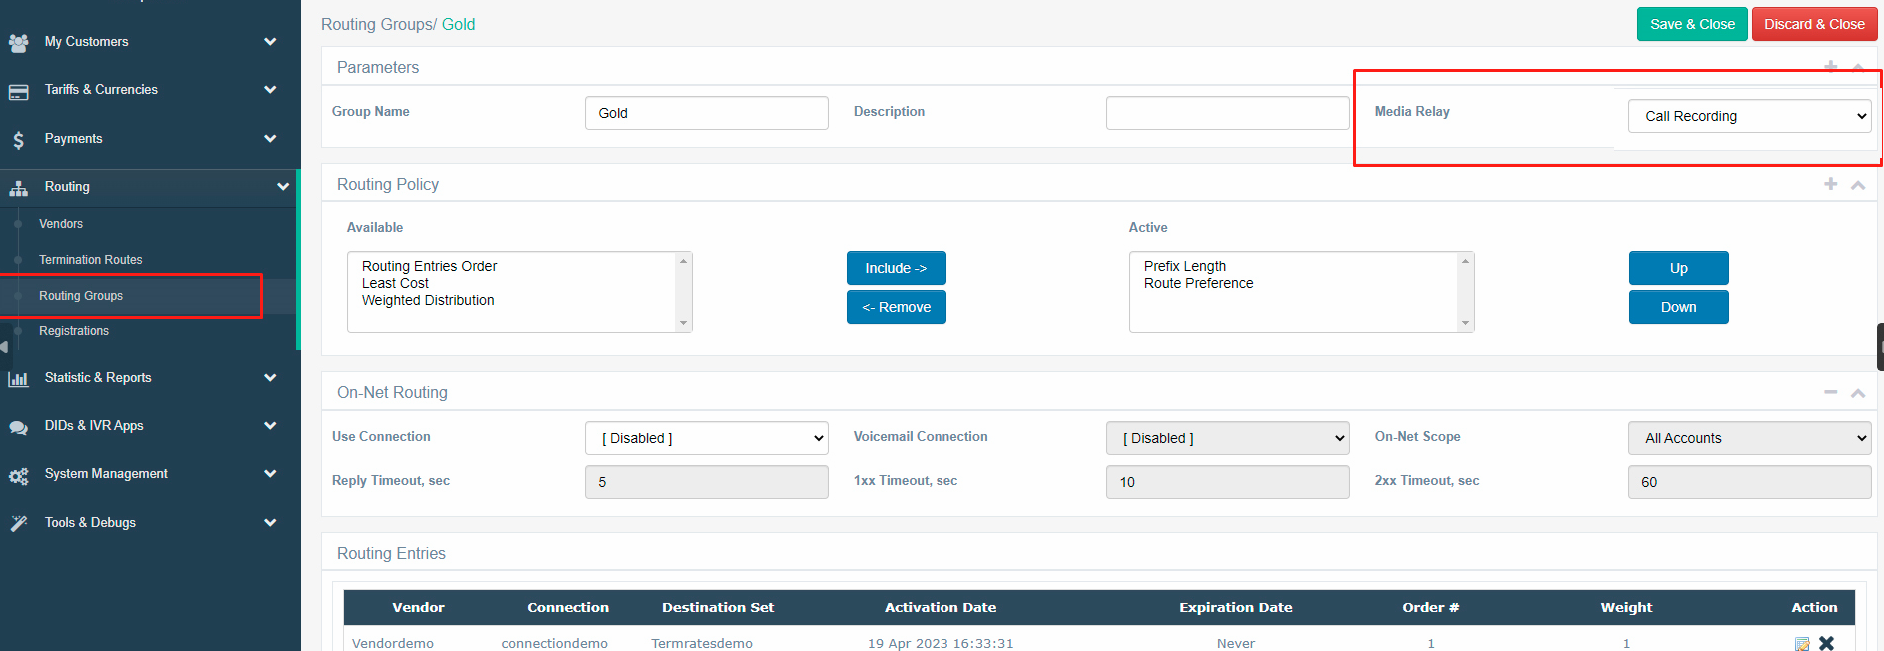
Step 3: Activate Call Recording for Routing Group.
To enable call recording for a specific routing group, you need to activate this functionality by going to the routing group settings page and selecting the Media Relay "Call Recording" option.
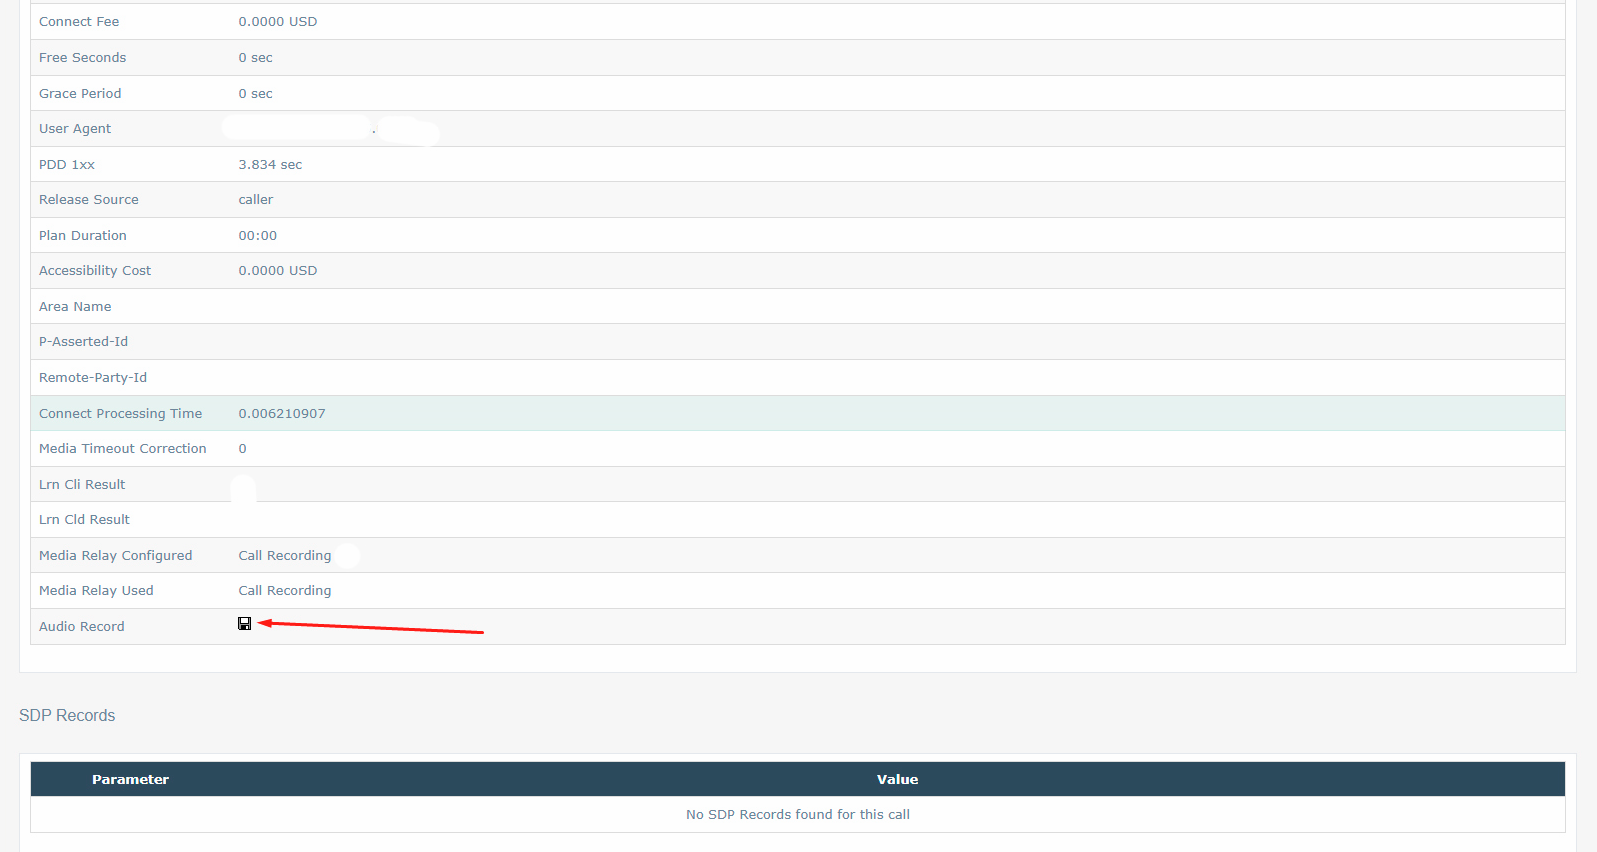
Step 4: Search and Save Call Records To search and save a call record, you need to find the call in the Call Records (CDRs) section of your FlySIP account. From there, you can go to Call Details and locate the recording of the conversation at the end of the page.